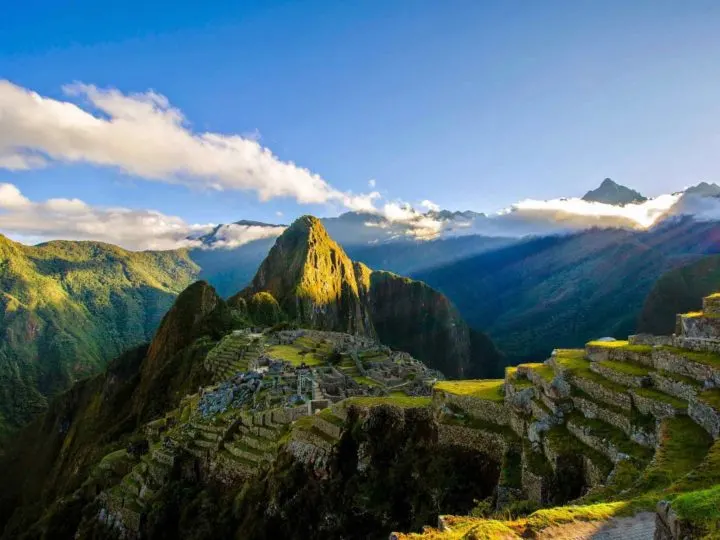
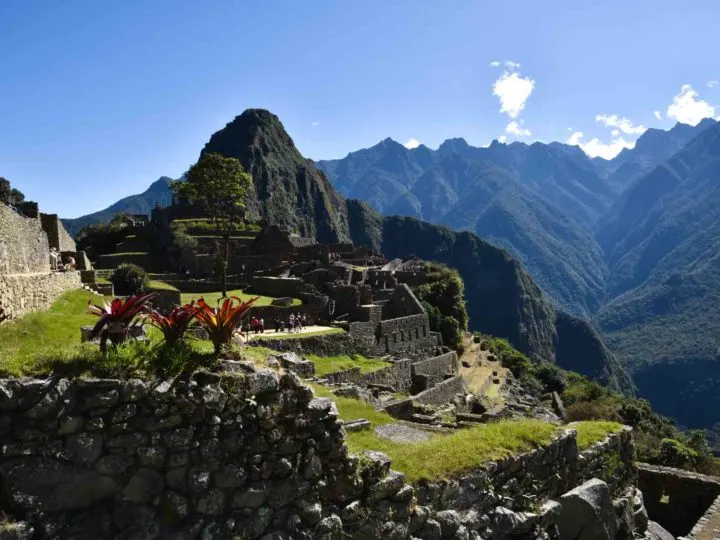
A trip that is on many travelers’ bucket lists is to visit the “Lost City of the Incas” – Machu Picchu. One of the seven wonders of the modern world, Machu Picchu is an incredible sight to see and place to experience.
For adventurous travelers, simply hopping on a bus or train to get to Machu Picchu just isn’t enough, and a trek through the cloud jungles of Peru on the famous Inca trail holds more allure.
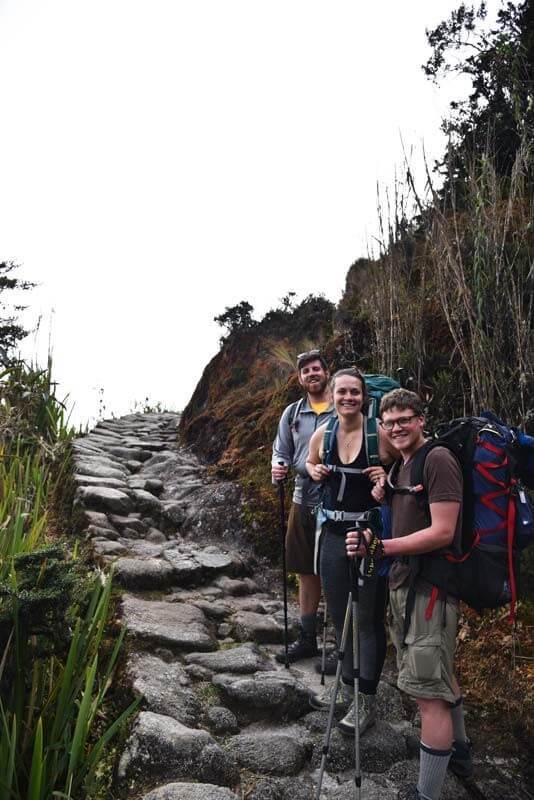
The four-day, three-night trek up and down the stone pathway of the Inca is the most popular means of arriving at Machu Picchu for backpackers, and it was one of the most memorable and incredible experiences of my life.
While there were definitely moments on the trail where my legs – and lungs – were burning, I definitely do not regret the extra effort it took to hike along this ancient path, and the sight of the sunrise over Machu Picchu on our last morning is one I will never forget.

The classic four-day hike to Machu Picchu
The Inca Empire built a vast network of roads throughout the Andes, and various treks can be done covering Inca routes in Ecuador, Bolivia, Argentina, and Chile, as well as Peru.
The most famous stretch of the trail, however, is the “Royal Road” segment, a path used by Inca royalty and pilgrims making their way to the sacred site of Machu Picchu.


This route generally takes travelers about four days to complete, and there are many tour operators that lead four-day, three-night trips along this section of the trail. While all tour companies differ in small ways to try to stand out from the competition, the trip looks generally the same for all tours.

Day zero
Most tour operators will have a pre-hike check in with trekkers the evening before the trip begins.
This is a good way for you to meet your tour guide, get last minute tips about things to bring that you might not have considered or forgotten, and learn an overview of what you will see and experience on the trail.
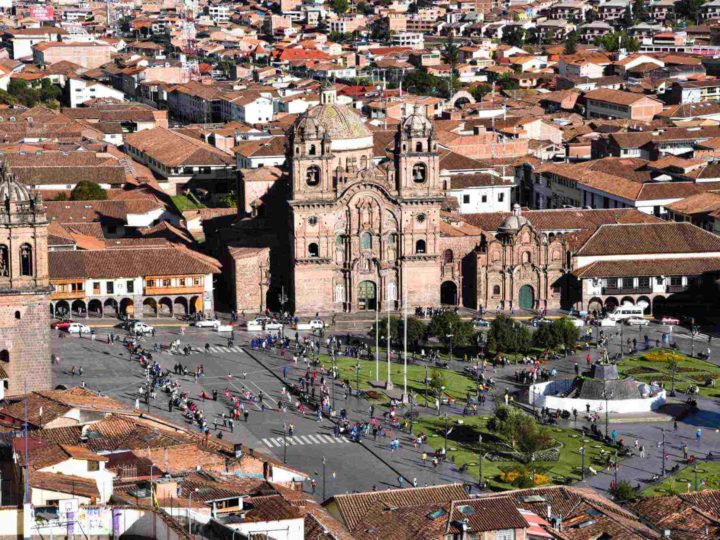
Be sure to fly into Cusco at least a day before your trek to attend this pre-hike meeting.
I would actually suggest arriving in Cusco several days in advance of your trek to give yourself time to acclimatize to the altitude. Plan your time acclimatising using our Cusco itineraries for everything from three to ten days in the city.
Arriving from sea level and expecting to trek through the Andes at up to 4,215 meters (13,828 feet) above sea level for four days is not just tough but could also be dangerous for your health. Altitude sickness is unpleasant at best and can be fatal at worst.
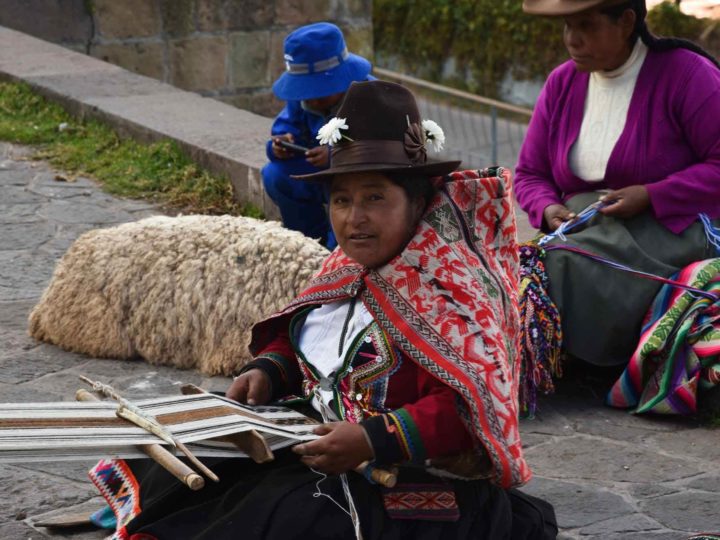
What’s more, Cusco is an amazing city to explore, even aside from Machu Picchu, so take some time to acclimatize and check out some of the other historical sites in Cusco and the surrounding Sacred Valley area.
We’ve also written about our favourite Cusco hotels, guesthouses and hostels as well as the best hotels, B&Bs and hostels in the Sacred Valley (which, at a lower altitude than Cusco, is good for acclimatising).

Day one
Be prepared for an early wake up on Day One of your trek! Most tour operators leave from Cusco around five or six in the morning to get to the trailhead (about a three-hour drive) with plenty of time to hike to the night’s campsite.
Many tour operators begin the first day’s segment at KM 82, or Piscacucho, although some begin at KM 88. The elevation at the start of the hike is about 2,600 meters (8,530 feet).
Want to support a sustainable, Peruvian-run company when you hike the Inca trail? Evolution Treks are my go-to suggestion thanks to their incredible work leading on porters’ rights and welfare on the Inca Trail and the exceptionally high-quality nature of their tours.
Most likely, you’ll have to wait in a bit of a line to get your passport, permits, and other paperwork checked out by government officials before being set free on the trail.
The Peruvian government is very strict about the number of trekkers allowed on the Inca Trail per day in order to preserve the ancient road system.
This is one reason why booking through a tour company (and booking early!) is important– the companies handle the government permits and paperwork necessary for you to even be on the trail. All you will need to do is hand over your passport to be checked.
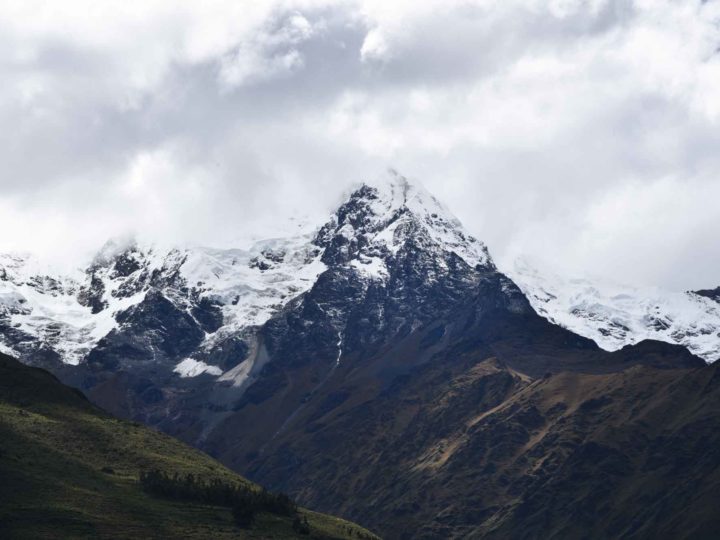
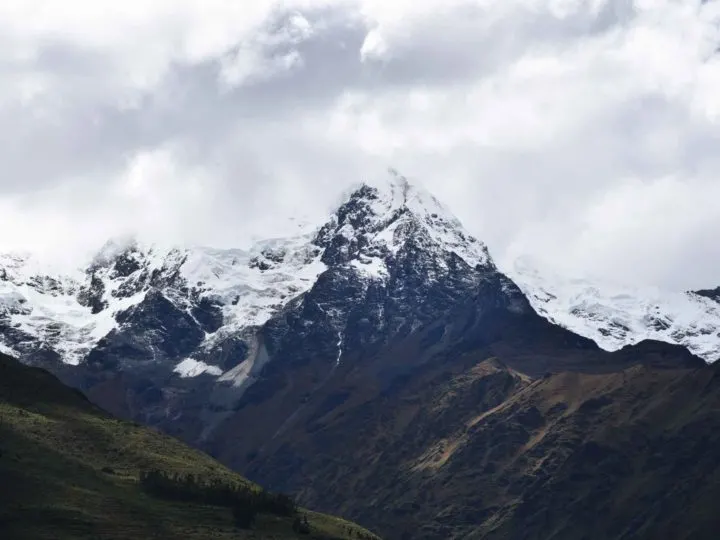
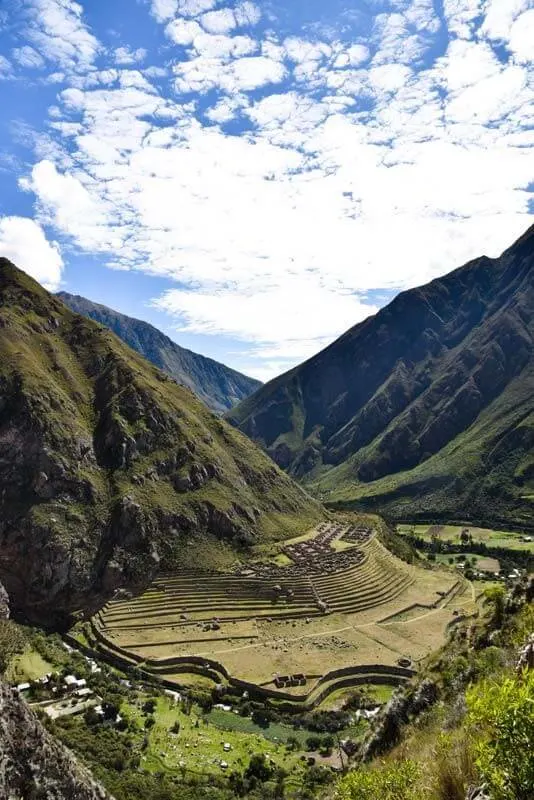
Once you begin hiking, you cross the Urubamba river on a suspension bridge and begin a relatively easy incline. Along the route, expect gorgeous views of the surrounding mountains, including the snow-capped Mount Veronica and several Inca ruins like the terraces of Llactapata.
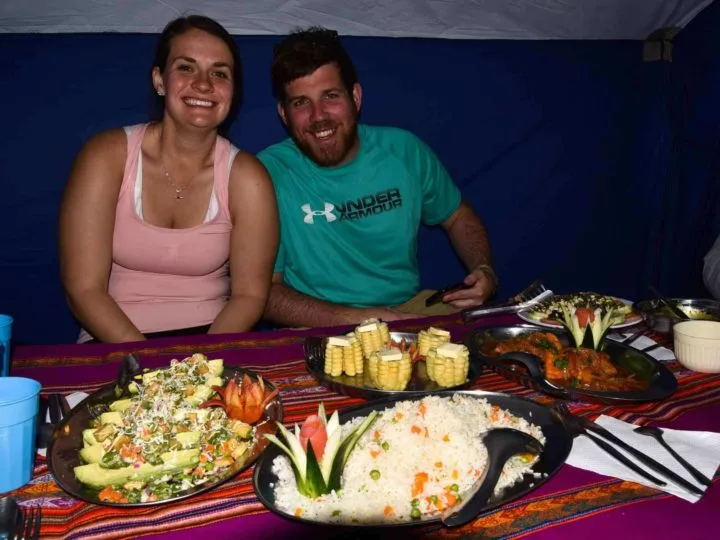
After several hours of hiking, it’s time for lunch. Your tour group staff includes a guide, several porters, and a chef and sous-chef, who are responsible for bringing along and preparing your meals – and WOW, the food is incredible!
Multi-course meals, complete with fancy garnishes, greet you at each stop, as well as a tent, tables, and chairs where you can eat and rest.
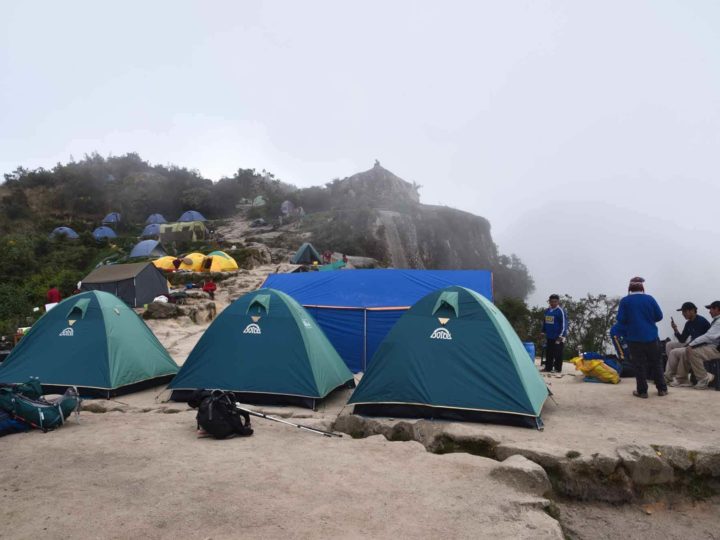
After lunch, continue to hike for several more hours before arriving at the night’s campsite. Most tours stop for the night somewhere around the Wayllabamba camping area, which sits at 3,000 meters (9,842 feet) above sea level.
Some tours even offer hot showers for an additional fee on this first night. If that’s an option offered to you, I personally think it was worth the 10 soles ($3 USD) for one final rinse before continuing on for the next few days.
Again, if you’re a backpacker used to carrying and setting up your own tent and campsite, expect to be pleasantly surprised to find an impeccably set up camp and another fantastic meal ready to be enjoyed when you arrive.
All in all, day one will include around 12 kilometers (7.5 miles) of hiking, with a relatively small elevation gain of 400 meters (1,300 ft.).
This generally takes tourists six to seven hours to complete in total hiking time (not including the breaks you take for lunch, snacks, or just to breathe).
It’s the easiest day of the trek, and a great way to ready your body for the challenges of the days to come.

Day two
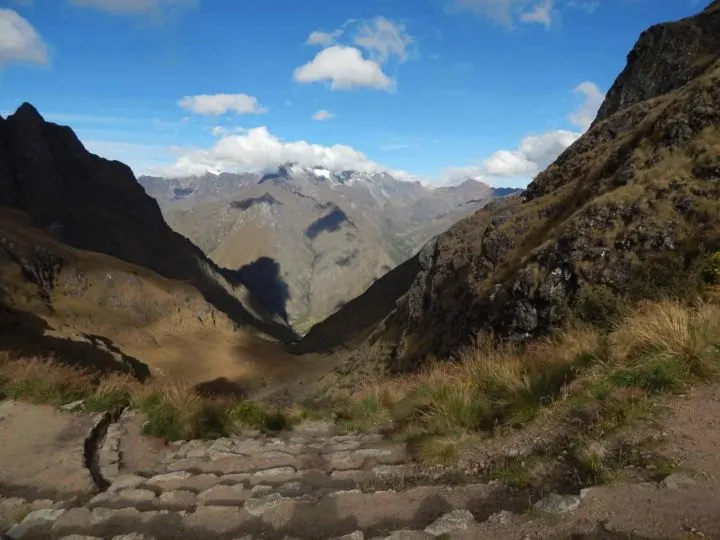
The second day of the hike is by far the most difficult: it involves the largest incline and highest elevation of the entire trek.
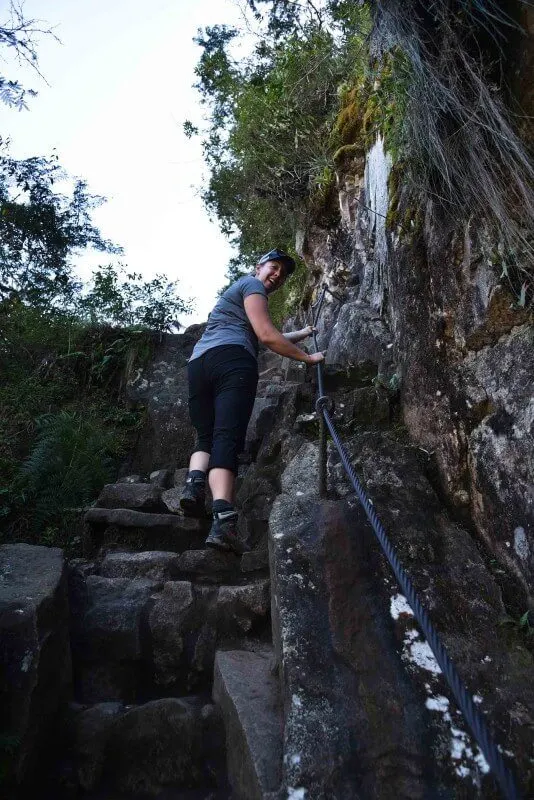
The morning starts with a steady climb that continues throughout most of the day. Eventually, the switch backs become stone stairs laid by the Inca. You will literally climb a staircase up a mountain!

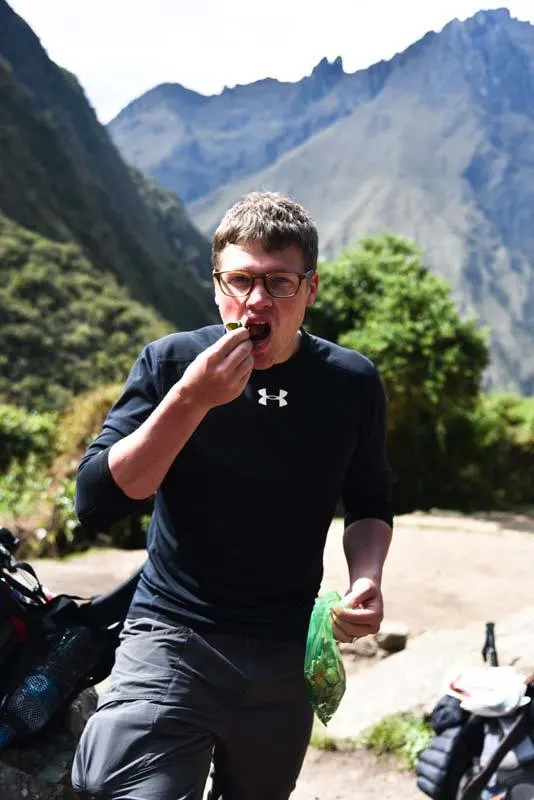
However, even for experienced hikers, these large stone steps are challenging. Take your time, pause to breathe and enjoy the scenery, drink lots of water, and maybe even try chewing a few coca leaves to help with the altitude while you climb.
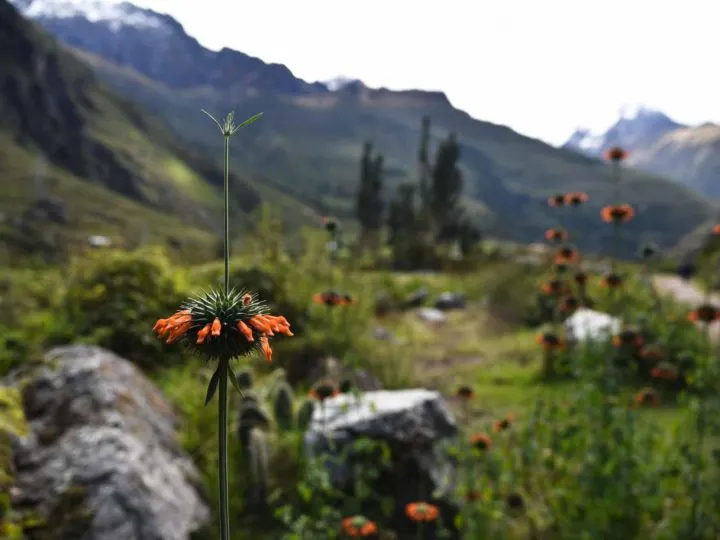
The views during your climb are beautiful, as you pass through cloud forests, and can appreciate nearby Andean peaks, and maybe even spot a condor or other wildlife. A much-needed lunch break gives you the chance to pause, before you continue your upward progress during the afternoon.
After several hours, you finally reach the top: Warmiwañusca or “Dead Woman’s Pass,” at around 4,200 meters above sea level (or about 13,780 feet).
I truly don’t know if I can think of another moment in my life when I was so overcome with excitement and a feeling of accomplishment quite like I felt upon summiting Dead Woman’s Pass! It is an exhilarating feeling!
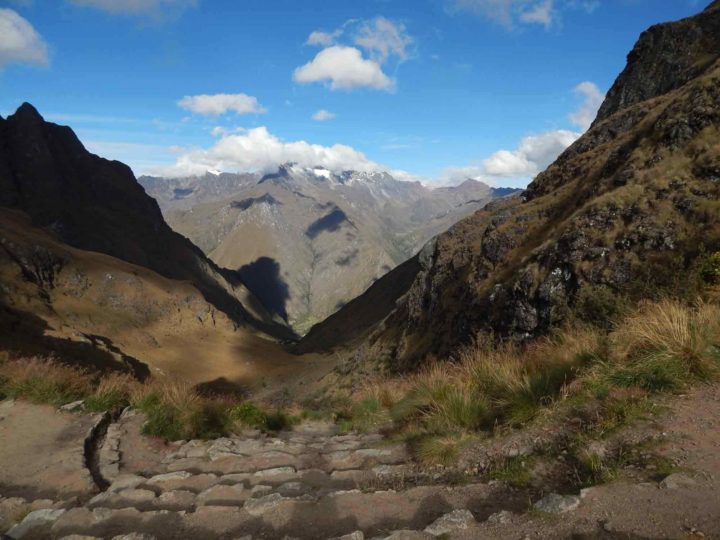
After a brief rest at the top, the descent begins down the other side of the mountain to the night’s campsite.
Again, the path comprises large stone steps, which can be harder on your knees and joints than the ascent to the top – for many, it’s a relief to have a chance to work different muscles going down than they’ve been working all day going up.
The second day ends at the Pacasmayo campsite, which sits around 3,600 meters (11,811 feet), and you will fall into your tent after dinner for a very sound sleep.
In total, your second day will cover around 12 kilometers (7.5 miles), just like day one, but the steep elevation and challenging nature of the terrain means that you hike for around seven to nine hours instead.

Day three
Day three starts with uphill – but, while your body may protest, this uphill stint is much easier and shorter than the previous day’s challenge!
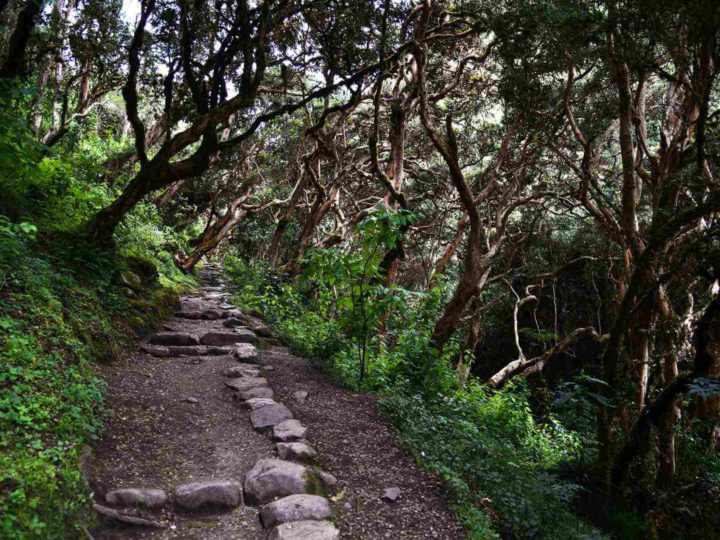
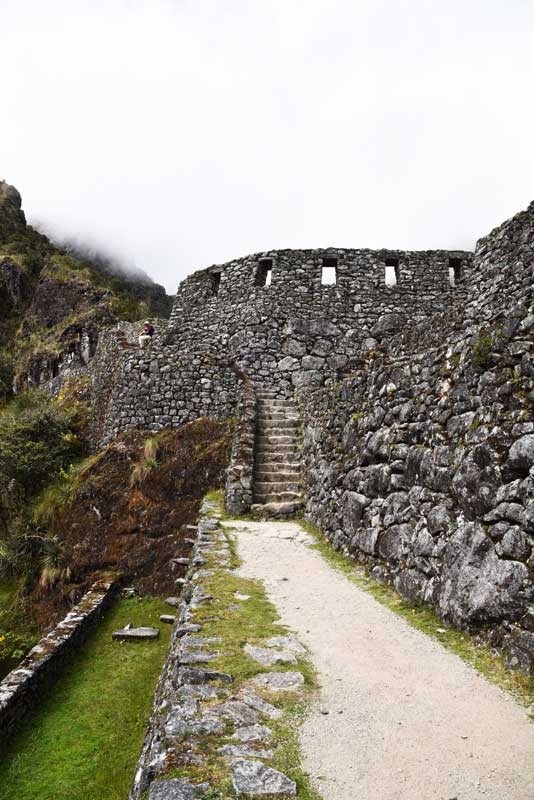
After passing the Runcuracay ruin, an archaeological site that used to serve as a guard post and rest area for Inca chasquis, or messengers, that were on their way to Machu Picchu, you summit a (relatively) small peak, and begin the mostly downhill section of hiking through the humid cloud forest that will characterize the rest of your day.

You may want to stop and explore other Inca ruins such as the Sayamarca – accessible via another (much shorter) steep stone staircase – and Qonchamarca sites along the way.
The Inca trail will also pass through natural tunnels and through the side of the mountain during your morning hike.
After stopping for lunch, the hike continues mostly downhill, passing several more Inca ruins along the way, until you reach your final destination at a campsite near Wiñay Wayna at around 2,700 meters (8,858 feet).
Day three is actually the longest hiking day in terms of distance: you cover 16 kilometers (almost 10 miles) in about seven to eight hours.
Day four
The final day of your trek begins with a very early start (most tours try to begin hiking by 4:00 am). Before the sun comes up, there’s time to eat a quick breakfast and pack up camp for the last time.
You part ways with your porters at this point (although you continue with your guide), so be ready to give them their tips before setting off on your hike.
Several hours of this morning will be spent hiking in the dark as you enter the site from the opposite direction that day trippers from Cusco do; a headlamp with fully-charged batteries is essential at this point.
The stone stairs in the dark are slow-going, but a glimpse of the sky through the trees at the stars above is enough to keep you moving.

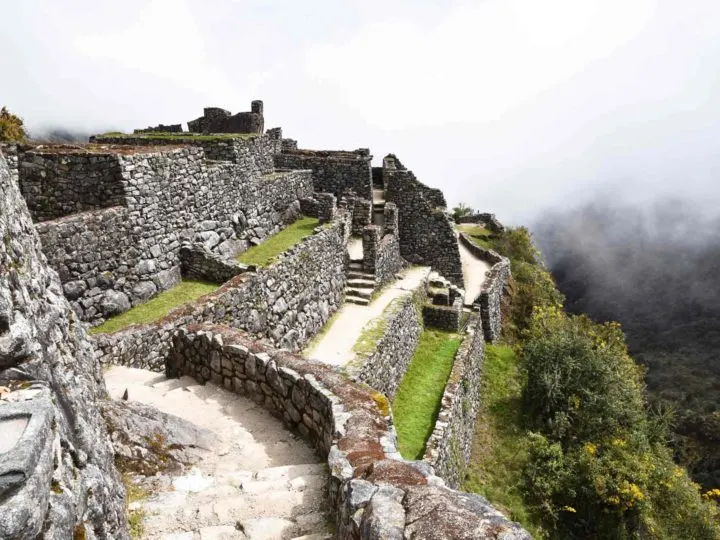
After a couple hours of hiking, you arrive at the moment you’ve been waiting for: the gate to Machu Picchu. Once the gate opens, you will continue to hike for approximately another hour as the sun begins to rise. It is beautiful to watch the jungle lighten around you!
At the Sun Gate, there is plenty of time to sit, relax, and watch the sunrise over the ruins of Machu Picchu. Hooray!
Take time to enjoy it and celebrate your accomplishment of surviving the Inca Trail; this is a moment I’m sure you’ll never forget.

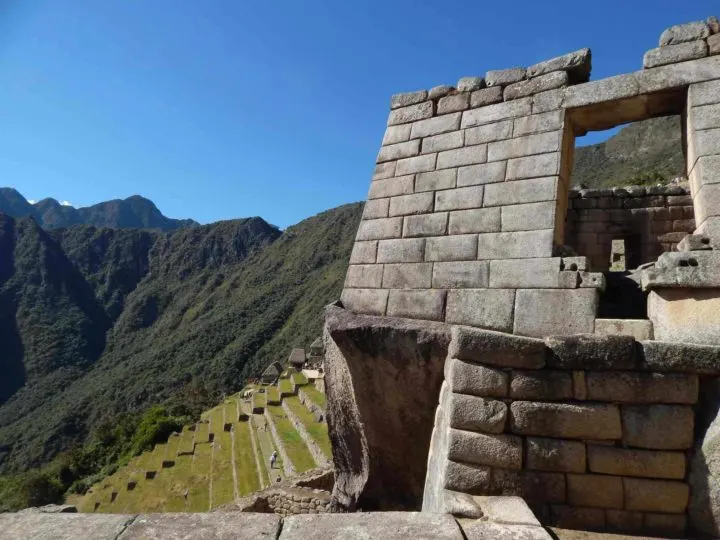
After the sun is up, an easy downhill slope brings you into the “Lost City.” At this point, you’re required to exit and re-enter the site with your guide, and check your backpack in at the entrance for a small locker fee.
Most tour operators offer a professionally guided, detailed tour around Machu Picchu where you learn about the different temples, architecture, and archaeological finds within the larger site.
If your trek guide does not provide a tour, you can join one of the other tours offered at Machu Picchu (tickets are priced around 152 soles or $45 USD per person).
If you’ve somehow not hiked enough, there are a handful of additional peaks you can add to your adventure.
We opted to include the climb up Huayna Picchu, for an additional fee ($85 USD per person). This is a very steep peak overlooking the city, that is so steep that metal chains attached to the mountain are necessary to help you keep your balance and stay on the trail when passing people going up or down opposite of you.
The view at the top is a stellar panorama of Machu Picchu and the surrounding valley, but if you want to save money – or save your legs – I wouldn’t consider it a necessary add-on to your trip.
The viewpoint from the Sun Gate is by far the most famous, and it is already included in your trip cost.

After having your fill of exploring Machu Picchu, it’s time to hop on a bus that will take you down the mountain to the town of Aguas Calientes.
Many tour companies include a final meal in Aguas Calientes, but if yours doesn’t, it is easy to find a restaurant to grab a bite to eat before heading back toward Cusco.
Depending on which tour operator you choose, your trip back to Cusco will include rail transportation, bus transportation, or a combination of both.
After arriving back in Cusco for the evening, be sure to have pre-arranged a night in a hotel or hostel – the thing on your mind at this point will be a hot shower and cozy bed to complete your epic Machu Picchu adventure!
The hike into Machu Picchu on day four is eight kilometers (5 miles), not including the time you spend actually exploring Machu Picchu or completing additional hikes like climbing Huayna Picchu – for other top-rated hikes in the area, visit our guide to the best hikes in Peru here.
In total, you will have hiked at least 48 kilometers (just shy of 30 miles) in the span of four days!
Preparing for the Inca Trail
When to travel
When planning a trip to Machu Picchu, the only time of year that won’t work is the month of February, as the Inca Trail, sanctuary area of Machu Picchu, and other Inca archaeological sites en-route are closed for restoration.
When planning your trip, however, here are some things to keep in mind:
First, it’s essential to book far in advance. Most trekkers do so at least six months ahead, particularly if you are traveling with a group, to ensure that they get the dates and tour company they want and that your tour company can acquire the proper government permits and paperwork.
Solo travelers or couples may have better luck finding space on a group tour with less prior planning.
The dry season in Cusco and the surrounding area lasts from May to October making these months the best time to travel. While there is no guarantee you won’t face fog or rain showers, there is less of a chance of a downpour during these months.
However, you can expect lower temperatures during this period. While day time temperatures for your hike hover at around 18-20°C (65-70°F) (which feels warm, particularly when the sun is out), night time temperatures can drop to freezing.
An insulated sleeping bag and warm layers are essential for the evenings.

Because this is a both a more favorable travel time and a period when North American travelers tend to vacation, these months tend experience greater tourist numbers.
Since the Peruvian government is strict about limiting daily tourist traffic on the Inca Trail, the number of tourists in Cusco and the surrounding area will not cause a drastic increase in crowds on the trail itself. You may need to book further in advance, however, if you go during the “high season.”
One of the biggest positives of the Inca Trail is that, by choosing to hike in to Machu Picchu, you arrive at the Sun Gate for sunrise – therefore beating most of tourists coming for a day-trip to Machu Picchu by train or bus.
When we visited in mid-June, we were able to get our tour of Machu Picchu almost completed with our guide before we began to feel “crowded.” We also didn’t have one rainy day for the trek, which was well worth it for me!
The months of November through April (excluding February, of course) are generally a little less crowded, marginally warmer (nighttime temperatures only drop to about 10°C (50°F)), and significantly rainier.
While the rain can be annoying, it also makes for lovely green scenery in the mountains. Remember to adjust your packing list accordingly if you choose to travel to Machu Picchu during these months – you’ll want fewer warm layers and more rain protection!
Choosing a tour company
Due to government regulations, you must hike the Inca Trail with a guide. If you would prefer to hike on your own, with no guide, check out the section on the Salkantay and other trail options below.
Choosing a tour company can be one of the most difficult parts of planning for your Inca Trail adventure because there are so many to pick from! Try not to be too overwhelmed by the options, and remember that most companies offer practically the same tour.
Trekking to Machu Picchu? Hike with this company
Evolution Treks are one of many companies offering Inca trail treks to Machu Picchu, but if you want to support ethical tourism that has a positive impact in Peru, they’re the only one to consider.
They pioneered improving working conditions and pay for porters, as well as introducing female porters to the trails. Their guides, porters and chefs are also the ultimate hosts.
A company we recommend is Evolution Treks. This company is known for its dedication to porter welfare, having pioneered projects such as hiring female porters and allowing porters to become shareholders in the company.
A porter to carry your personal belongings so that you will be hiking with much less weight each day is also included. They also allow you to bring your own sleeping bag and sleeping mat, which can help you keep your costs down a little.
Many companies include sleeping bags and sleeping mats in the price of the tour; if you have a lot of your own trekking gear, you can lower your costs by opting for a company that allows you to bring your own.

There are many other options for tour operators on the Inca Trail, so start your search with Evolution Treks and compare them to others you come across.
You can also read what it was like to hike the Salkantay.
Remember to look for the inclusion of transportation to the trailhead and back from Machu Picchu, the number of included meals, the inclusion of a tour of Machu Picchu once you arrive, and, of course, the price plus the price of any add-ons you may want.
The cost of hiking the Inca Trail
Most tour companies cost around $800 USD per person for a group rate (which means you can be placed with other hikers – a great opportunity to make friends!).
You can also opt for a private tour, meaning no other people can be placed in your group, from anywhere between $1,000 USD and $1,800 USD depending on the size of your private group.
While this cost may seem high at first, once your break it down, I’m sure you will see, as I did, that it is more than reasonable and (dare I say it?) actually quite cheap for all that is included.
The tour company we chose cost $700 USD for a group tour. All permits and entrance fees for Machu Picchu, 11 meals, a tour guide, chef and sous chef, a team of six porters carrying all tents and food, plus transportation to and from Cusco were included.

To just purchase entrance into Machu Picchu for 2019 the cost is 152 soles, or $45 USD. To just purchase a one-way train ticket on Peru Rail from Machu Picchu to Ollantaytambo (which our tour included as part of our way back to Cusco) costs between $55 USD and $180 USD. (Read more about the cost of visiting Machu Picchu in our expert-written guide).
When you divide all of that out, you’re really paying a good price for all that is included, especially considering that you want to be sure that your guides, chefs, and porters are getting paid a decent wage for their services.
Some tour companies offer additional goods or services for additional costs:
- Our company offered the use of an additional porter to carry personal items for $80 USD.
- You can choose to add on the Huayna Picchu hike on the last day for $60-90 USD depending on the time of year you are traveling.
- You can also choose to rent additional gear if you did not bring or do not own your own, such as sleeping bags, sleeping pads, trekking poles, rain ponchos, etc. at various prices.
By far the cheapest way to hike the Inca Trail is to go with a group tour, bring and carry all of your own personal gear, and skip any add-ons that may be offered.
Remember, however, that this is a once-in-a-lifetime adventure for most people, so if there is something you want to see or do, do it! You won’t regret spending the extra money for the incredible experiences you have on the Inca Trail.
Tipping guides and other staff
On that note, most of what the guides, chefs, and porters make their living on is the tips from trekkers. While most tour operators tell you that tipping is optional, please include this in your cost planning and tip your crew appropriately.
Recommended tips range from 60-150 soles (or about $20-50 USD) per person, although this may change depending on how large your group is.
For example, although we opted for a group tour, the dates we chose to hike weren’t chosen by any other travelers, so we ended up with a relatively small group of four hikers.
Therefore, we chose to each tip a bit more than usual in order to make the tip comparable to that of a larger group that the porters were used to. On the last day of the trek, be sure to give your tour guide the tip money and he or she will divide it amongst the crew.
Don’t forget to tip your guide as well!

Packing for the Inca Trail
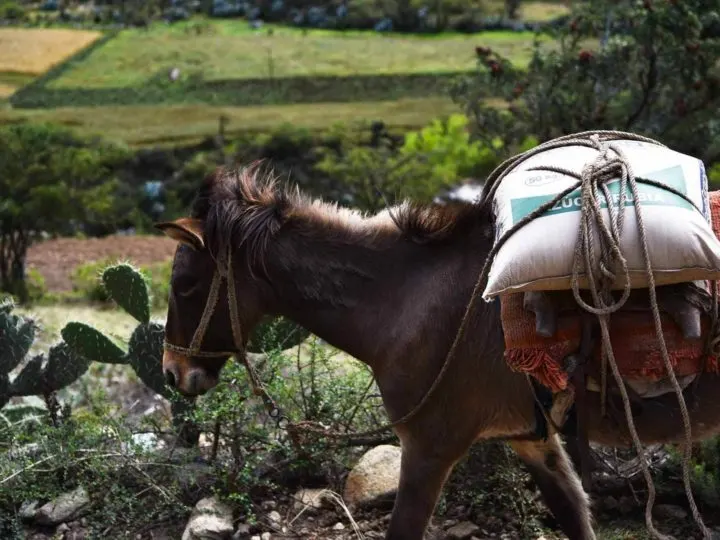
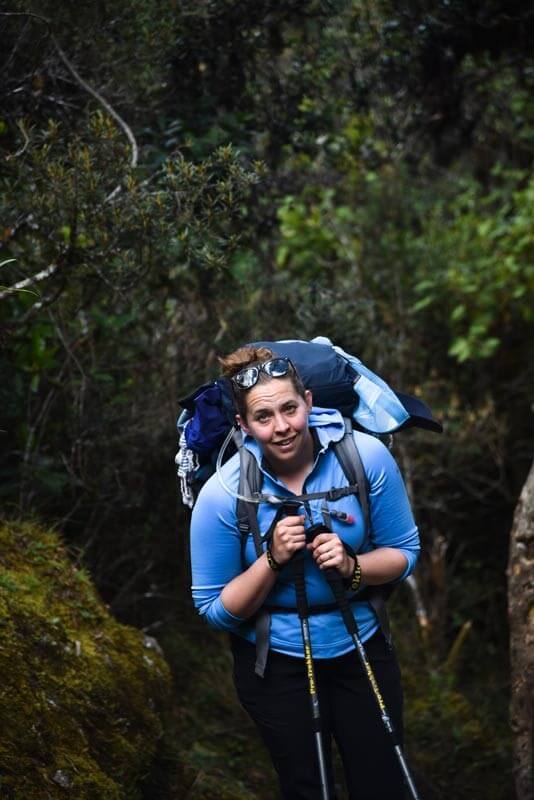
One of the nice things about hiking the Inca Trail is that you don’t carry your tent, food, or water – all of which are heavy items.

Many of the tour companies even offer to carry your personal belongings for you for an additional charge! We chose to save some money and carry our own packs, but most (if not all) of the other trekkers we passed were simply carrying their own water, light snacks, and a camera (and the porters carried the rest).
Whether you choose to carry your own full pack or pay for a porter, here are a few things you need to bring:
- A backpack. Backpacks made specifically for hiking with a solid waist strap are helpful, particularly when climbing up and down the stone steps. What size you need depends on if you’ll just be carrying things you need for the day (a daypack from 20-40l) or you’ll also be carrying your sleeping gear and changes of clothes (40-50l). I’m a big fan of Osprey rucksacks (for women: REI|Amazon; for men on REI|Amazon).
- A sleeping bag. If you can get a sleeping bag that stuffs down to a small size that’s best. I love the Rab Ascent Down Sleeping Bag (1kg/2.5lb) and The North Face Stormbreak 20 Sleeping Bag (1.4kg/3.9lb) – both are suitable for all four seasons, and are light to carry.
- A sleeping pad. We loved our Klymit inflatable sleeping pads since they shrink to a very small size and are very lightweight, making them easy to carry. It’s also the only sleeping pad I’ve had that allows me to comfortably sleep on my side while camping without waking in the morning with incredibly sore hips and shoulders. Again, you can hire an inflatable sleeping pad from the trekking company.
- A change of clothes (or two). I personally traveled with two pairs of hiking pants, two t-shirts, two long sleeve shirts, and two sets of undergarments so that I could wear one and have an extra. That way if it rained or if I got sweaty, I could let one set of clothes dry every other day to keep me warmer instead of having to hike in wet clothes. Remember to include different layers, as the temperature changes depending on the elevation and time of day. When the sun was out, we were usually in t-shirts, but in the early mornings and evenings we needed long sleeves and pants. I love my Jack Wolfskin down jacket (Amazon), as it’s extremely warm and lightweight
- Hiking boots. Be sure to try them out and break them in a bit before your trip. I saw too many people with blisters from fresh-out-of-the-box hiking boots while on the trail. We love Salomon hiking boots (for women: REI|Backcountry|Amazon; for men: REI|Backcountry|Amazon).
- Hiking socks. A couple of good pairs of socks go a long way to avoiding blisters and keeping your feet comfortable. Be sure to bring at least two pairs to allow one to dry while the other is worn. I really like the Darn Tough brand, get them on REI|Amazon.
- A rain poncho or other rain gear. I took a rain jacket and water-proof pants to put over top of my clothes. I love the Patagonia Storm10 Jacket as it’s an ultralight, easy to pack but fully waterproof jacket (Patagonia); the North Face Alta Vista Jacket (Amazon|REI) is significantly cheaper but offers good weather protection. For him: check out the men’s version of the Patagonia Storm10 Jacket on REI|Backcountry|Patagonia; if you want something more affordable, the North Face Alta Vista (Amazon|REI) is a good shout. I’ve also heard great things about Arc’teryx (REI|Amazon) too.
- A cap or brimmed hat for sun protection.
- Sunglasses.
- Sunscreen. The sun in very severe at high altitude, even if it doesn’t feel particularly hot. Protect your skin!
- A beanie. While I was not cold during the day, I always like to wear a warm hat while sleeping in a sleeping bag.
- Bug spray. The jungle can get quite buggy! Find it on Amazon.
- A headlamp. It gets dark in Peru around 6pm (depending on the time of year) so a headlamp is essential for getting around camp. It is important for the last morning of the Inca Trail too, when you begin hiking in the dark. Don’t forget to check the batteries before starting, take extras, and hike with them separate from the headlamp to ensure they don’t run down in your pack (some headlamps have a “lock” on them too). I love Black Diamond headlamps (on REI|Backcountry).
- Trekking poles. If you haven’t trekked with poles before, it may feel alien to begin with, but they can be really useful, especially if hiking with weight. They also improve your stability and help protect your knees, especially on the downhill sections. Many of the tour companies have these to rent, if you prefer not to buy. Check my recommendation from Black Diamond on REI|Backcountry|Amazon.
- A water bottle or Camelbak. Your trek team will provide boiled water each morning and at lunch and dinner time, but you will need something to carry it in. Dehydration is a big issue during consistent exercise, especially at altitude, and it compounds the symptoms of altitude sickness. You’ll need something with at least a 1 liter capacity to get you between refill points, but two or more liters would be much better. I like to hike with a hydration bladder, such as a Camelbak, as I think it helps me drink more consistently throughout the day. Find them on REI|Backcountry|Amazon.
- Toiletries. Bring a toothbrush, toothpaste, deodorant and a washcloth for wiping grimy hands and faces at the end of the day.
- Toilet paper and plastic bags to pack it out. As our guide said, the only bathroom on the Inca Trail is the “Inca Baño” which does not include walls or a toilet, let alone T.P. (aka no bathrooms). On the trail, you’ll need to attend to a lot of your toileting needs in the open air. On some of the treks, particularly the Salkantay, Inca Trail and Choquequirao, there are campsites with toilet facilities. Of these, some are hole- in-the-ground style, while others are long-drop style, although you might find some flushing toilets if you’re lucky. Particularly on the Inca Trail, campsite toilets are not very clean or well-maintained. For any of the options, you’ll need to have your own toilet paper. Some spots may provide bins to throw it in (you can’t put toilet paper down the toilet anywhere in Cusco or Machu Picchu), but the rest of the time, you’ll need to have a way to pack used toilet paper out. Doubled up ziplock bags work well. If you find yourself caught short away from facilities, you should try to follow leave no trace guidelines as much as you can.
- Light snacks. A granola bar or two just to tide you over between meals. As the meals are so good and filling, you may not need any extra snacks, and some trekking companies will include simple snacks like fruit and peanuts each day. But it is nice to have a little extra, just in case.
- Camera! Be sure to bring your camera with plenty of batteries. There is no electricity on the Inca Trail, and you don’t want to get to Machu Picchu and suddenly not be able to take any photos.
- Portable charger. If you are using a GoPro or phone for your photos, a portable charger might be the best way to ensure that your photo-taking abilities last until the very end.
- Your passport. You will need it to enter Machu Picchu, as well as the Inca Trail.
- Money. You will need this to tip your tour guides and porters. (See above “Cost” and “Tips” sections to help you determine how much to bring) as well as to buy snacks or souvenirs.
- Dry bags. While you can use plastic bags to protect your clothes from the rain in transit, I prefer to travel with a couple of dry sacks (REI|Amazon), as they’re reusable and more environmentally friendly!
Other options for hiking in Peru
Shorter Inca Trail options
If you want to hike in to Machu Picchu, but don’t think four full days of trekking is for you, there are many shorter options available.
Evolution Treks offer three-day, two-night and two-day, one-night options for hiking to Machu Picchu via a shorter section of the Inca Trail. Again, you can receive a 5% discount off your trek by using discount code WorldlyAdventurer when enquiring.
Some see you staying at hostels, rather than camping, and prices are lower than the classic four-day hike, averaging around $500 USD.
These shorter options are great for people who are unsure of their trekking abilities, prefer less days spent without a shower or a bed, or simply don’t have as much time to dedicate to a trip to Cusco, Machu Picchu, and Peru.
Another great option for visiting Machu Picchu that involves less days hiking is this tour with Loki Hostel. Several friends of mine booked this tour and absolutely loved it.
The four-day tour offered by Loki includes a short section of hiking on the Inca Trail, plus entrance to and a tour of Machu Picchu, while also offering several more activities during the other days, including mountain biking and white-water rafting.
If you’re an adventurous person who just doesn’t enjoy backpacking all that much, this tour option might be for you!

Alternatives to the Inca Trail
There are several alternative trails available for trekkers who want the experience of hiking in Peru, but want to avoid the actual Inca Trail. The Inca Trail is Cusco’s most famous trek but can be hard to get a space if you’re arranging a last-minute trip to Peru.
You might have heard of the Salkantay Trek and be wondering if it’s better than the Inca Trail (this article from our Peru expert Jenny should help you decide!).
If you’d also prefer to hike without a guide, these trails are a better fit.
Three popular alternatives to the Inca Trail are the Salkantay, Choquequirao, and Lares treks.
The Salkantay Trail
Highlights along the Salkantay trail are the views of the snow-capped Mount Salkantay and Lake Humantay, plus you can stop along the trail at coffee farms where trekkers can pick and roast their own coffee beans before enjoying a cup.
Finally, the Salkantay trek ends at Aguas Calientes – the town just beneath Machu Picchu – so it’s easy to add a visit to this landmark at the end of your hike.
The Salkantay trek is usually done in four days days, three nights, but experienced hikers can tackle it in three days At 72 kilometers (45 miles), reaching 4,630 meters (or about 15,190 feet) above sea level, it is both longer and higher than the Inca Trail.
The Salkantay is the second most popular option behind the Classic Inca Trail trek, and I’ve heard nothing but good things from friends who have experienced it. [Read about founder Steph’s experience of hiking the Salkantay trek]
The Choquequirao Trail
Another historic Inca site is Choquequirao. If you’re looking for a more unique, off-the-beaten-path adventure, hiking to Choquequirao rather than Machu Picchu might be a better option for you.
This trek takes four days and three nights to get there and back and receives significantly less traffic – around a dozen hikers per day.
The trail is longer (about 64 kilometers or 40 miles) and low (your top elevation will only get to about 3,050 meters (about 10,000 feet)), but the hike is seriously challenging thanks to a steep climb that takes you up the edge of the mountain on which the citadel is lodged.
Upon arrival at your final destination, the entrance into the Choquequirao site is about 60 soles ($18 USD) per person, and you can purchase it right at the gate, so there’s no need to book anything ahead of time.
For more ambitious hikers who want to see Machu Picchu, the Choquequirao trek can be extended to nine days and include both Inca sites, but you will need to purchase your entrance into the Machu Picchu site before you leave Cusco.
For more detailed information on this trek, check out our article about hiking the Choquequirao.
The Lares Trail
Another option for hiking in Peru is the Lares trek. This trail takes two or three days, and covers just 36 kilometers (22 miles). However, the altitude gets up to about 4,800 meters (15,748 feet), so be sure that you are well acclimated before choosing this trek.
Again, the pros of choosing this trail as opposed to the Classic Inca Trail are less traffic and crowding, and the fact that you will not need to book as far in advance. The con of choosing the Lares trail is that you will not end in Machu Picchu.
Most of the tour companies, however, that offer treks on the Lares will include a day tour of Machu Picchu at the end of the trek. Rather than hiking in, you will simply take a train or bus to the site, so you will still be able to check that off your bucket list.


If you prefer to trek on your own without a guide, that option is available to you for all three options, but please weigh your choices carefully when choosing to trek without a guide. Some things to consider before trekking without a guide:
- Will you have time to acclimatize to the altitude before beginning your hike? Experiencing a bad bout of altitude sickness without emergency equipment or guides trained and available to help you in that situation could be very dangerous. (The same goes for food poisoning. I had a friend who hiked the Salkantay guide-less and experienced this. Not fun.)
- Do you have the proper equipment? And do you want to carry all of it? Without a tour company, you will need to pack in all of your own equipment, which will increase your packing list to include a tent, camp stove, all the food you will need, etc. This added weight while hiking, and the added expense of purchasing or renting the equipment if you don’t already own it, might be something you want to avoid.
- Do you actually want to visit Machu Picchu? These alternative routes do not end at the Sun Gate overlooking Machu Picchu the way that the Inca Trail does. You can, of course, still visit the site. If you choose to hike one of these routes with a tour company, most of them will include a trip to Machu Picchu on the last day. If you choose to hike on your own, you will either forfeit seeing Machu Picchu, or you will need to make arrangements to visit it on your own after the trek. This means purchasing your tickets to the site ahead of time, so be sure to make arrangements before you start your hike!
Whether you opt for the classic four-day, three-night Inca Trail trek or one of the alternatives, I hope that you will be able to visit Peru and enjoy the gorgeous natural and historical sites that this area of the world is home to, and I hope that this guide helps you plan out the perfect trip!